Saturday, September 22, 2012

What is this (The meaning of (this) keyword) ?

As you have seen in the (In C# everything is object) post how the button object is created. You may have noticed that in the InitializeComponent() method to set a property of a button object it uses the this.button syntax. So what is the meaning of this this syntax? I know many of you guys don't know about it but always use it inside a method with objects or fields etc. Let me give an example. Maybe this will clear the concept.

1. Open the IDE.
2. Create a project.
3. Create a Class named Add.
4. Create two integer fields in this class.
5. I named them firstNumber & secondNumber.
6. Now create a method name AddTwoNumbers(int firstNumber,int secondNumber) which will return a integer type value which is just the addition of the firstNumber and secondNumber. Give the method  integer type parameters. The parameter should have the same name as the fields.
7. Now set up a UI. Containing two textBox for the first number and second number input, a button that will add the given number after its being pressed , and of couse a last TextBox to show the result of the addition.
8. Double click on the addButton and write the followings:
            Add addNumbers=new Add();
            int total=0;
            total = addNumbers.AddTwoNumbers(Convert.ToInt32(textBox1.Text),                            Convert.ToInt32(textBox2.Text));
            textBox3.Text = total.ToString();

9. Now go back to the Add Class and write this in the AddTwoNumbers(int firstNumber, int secondNumber)
            this.firstNumber = firstNumber;
            this.secondNumber = secondNumber;
            return this.firstNumber + this.secondNumber; 
10. Run the program and give two numbers and press add. tada!!! you just add two numbers
11. The main thing is here that my function parameter and my object fields both have the same names. So how will my compiler distinguish the difference of my object field and my parameters. Thats where the this keyword comes in and solve our problem. The thing is when you omit the this keyword from the beginning of the object fields you just set the value of the parameter to that parameter. Now tell me why the heck will you do that. That doesn't mean anything. So to strictly say that the parameter value will be assigned to the fields, you need to have the this keyword. The this keyword just say that (I want to deal with this object's fields, methods etc only). Otherwise at the debugging you will not see any errors. But due to the fact that the compiler doesn't distinguish between them it will just provide you with a wrong output. The this keyword has a very large effect when you compare two objects. So maybe I cleared the fact that why you use the this keyword. Later you will find more values of the this keyword.

Interesting Applications (Search and Highlight Text in a RichTextBox)

I promised you that today I'm gonna bring a interesting application. So here it is, in this application user will write something or paste something in the richTextBox control. Then he will provide a search keyword in the search textBox and will press the search button. The application will highlight the occurrence text in richTextBox and also show the number of occurrence in another textBox. So lets build the UI.
My UI looks like this:
Now lets deal with the business of coding

1. Double click the searchButton and write down the following code
            int total = 0;
            string searchKey = searchKeyTextBox.Text;
            string article = articleRichTextBox.Text;
            int indexPosition = article.ToLower().IndexOf(searchKey.ToLower());
            int searchKeyLength = searchKey.Length;

            while (indexPosition != -1)
            {

                articleRichTextBox.Select(indexPosition,searchKeyLength);
                articleRichTextBox.SelectionBackColor = Color.LightBlue;
                articleRichTextBox.SelectionColor = Color.White;
                indexPosition = article.IndexOf(searchKey, indexPosition + searchKeyLength);
                total = total + 1;
               
            }
            numberOfOccurrenceTextBox.Text = total.ToString();
            searchKeyTextBox.Text = string.Empty;

2. Now let me describe what is going on here
3. I took a variable name total to trace down the number of search keyword occurrence.
4. I took two string type variables and set the value of one to the text string of the searchKeyTextBox.Text and the second to the articleRichTextBox.Text.
5. I took a integer type variable indexPosition and  set the value to
=> article.ToLower().IndexOf(searchKey.ToLower());
6. It just took the value in article string set all the letter in the string to lowercase then it finds out the index (which is of course an integer)of the seacrhKey string (the first occurrence index of the searched word)
7. Here I use the ToLower() method cause if I make all the letter in the article and searchKey to lowercase. I can find the occurrence even if someone use Uppercase when they search.
8. To take the the length of the Searched key I took a variable called searchKeyLength.
9. Then I initiate a while loop.
10. This loop continue until the value of the indexPosition is -1.
11. Why til -1? Cause the IndexOf() method always returns a -1 if it doesn't find any starting index of the given text in the first brackets.(Means the word doesn't exist in the context.
12. Then the code inside the loop articleRichTextBox.Select(indexPosition,searchKeyLength); just select the searched text from its first index to its last index.
13. After That it colorize the Text. Change the color value and see changes.
14. Then it increment the indexPosition to the position after the first occurrence of the searched text.
15. Increment the total.
16. After the loop executes successfully I just paste the value of the total in the occurrenceTextBox.
17. The last line only vanishes the text from the searchKeyTextBox after the searchButton is pressed.
18. There is a problem in the code. What?
19. After debugging if you search a text for the first time it will show the highlighted text in the richTextBox.
20. But when you try with a different word. The first selection will also be there.
21. This problem can be solve by writing three lines at the beginning which will just select all the text set them to default color and then will find the searched text and highlight it.
            articleRichTextBox.SelectAll();
            articleRichTextBox.SelectionBackColor = Color.White;
            articleRichTextBox.SelectionColor = Color.Black;

Here I provide the full Application. You will find that I named all the objects,variable,functions according to the C# naming convention. Its a good practice for you if you want to be a good programmer.
Download Here 

Friday, September 21, 2012

myName My First Object

We discuss enough about Object and Class, now its time to create our own Class and its Object. To create a class all you have to do is,

1. Open the IDE.

2. Create a project. Name it whatever you want.

3. Under solution Right Click on the project => Add => Class.

4. A window will popup. Name the Class Name. Always name the class in Pascal Case. Later I'll post a table on naming conventions. For now Pascal Case in the convention where every First letter of a word is in Upper Case. Like: NameOfMyCompany, MyName etc.

5. Press OK. And you will get a Class named Name;

6. Suppose our client want a application that will accept a firstName, middleName, lastName in three textBox and will return the full name and the reverse of the full name.

7. Finding object field is very important in OOP. You shouldn't have fields that has no values in your program.

8. So in our program we should have three fields which are all string field called firstName,middleName, lastName.


9. Now we write have to write two method that returns the full name and reversed name respectively.

10. So we just blueprinted our problem domain in the Name Class. Why don't we create our UI (User Interface).

11. Design a UI like this:


12. Double click on the button.

13. Now create an object named myName of our Name class. and initialize it. You will have

Name myName = new Name();

14. Now set the value for the class Fields by writing:

myName.firstName = textBox1.Text;

myName.middleName = textBox2.Text;

myName.lastName = textBox3.Text;

textBox4.Text=myName.GetFullName();

textBox5.Text=myName.GetReversedName();

15. In the Name Class write this in the GetFullName method

public string GetFullName()

{

return firstName + " " + middleName + " " + lastName;

}


16. Now write this in the GetReversedName method

public string GetReverseName()

{

string reverseName = "";

string fullName = GetFullName();

for (int index = fullName.Length - 1; index >= 0; index--)

{

reverseName += fullName[index];

}

return reverseName;

}

17. Both methods returns a string. It is the return statement at the bottom of a method.

18. Run the program and give three parts of your name in the textBox and Click show.

19 Tada!!! You will get your full name and reversed name in the bottom text Box's.


Note 1: I suppose you have some basic language knowledge. The code in the GetReversedName is a code block that just takes the last index letter from the fullName string and place it at the starting index of the reverseName string variable. Then it just completes a for loop that traversed reversely and reverse the value of fullname string.

Note 2: Readers if you want some brief description about variable, array, arraylist, list, queue, stack etc. Please comment. I'll provide important word files on them. Otherwise I'll just go ahead assuming you all know these things.

In C# Everything is an Object

I assume you read the document and had a basic concept on Object & Class. So how about I told you that everything you drag from the toolbox into the Form creates an object.

For example lets talk about the Button control.

When you drag a button into the Form, you create an instance of the (Button) class. Button class contains some field for the button object and also have some methods. So how you place values in those fields and interact with those method? You already did in the previous examples. When you write (textBox1.Text = "name") you just set a value for the field (public string Text) in the Button class to a string "name". Again when you write (textBox1.Clear();) it just called the method (public void Clear()) and clears everything from the textBox1.

When you create an object you always have to initialize it to work with it in the application. To initialize an object all you have to do is to write:
                                                 
                                                                new ClassName();

For example:

When you drag a button it just create the object like: Button button1;
But when you start debugging the  InitializeComponent(); method initialize the button1 object like this:

this.button1 = new System.Windows.Forms.Button();

To see this initialization double click on the Form1.Designer.cs and go to the (Windows Form Designer Generated Code) region and expand it. You will find the InitializeComponent(); method under which the command this.button1 = new System.Windows.Forms.Button(); is generated.

So if you delete the InitializeComponent(); line from the Form1.cs
you would end up with a blank Form. Cause the program will only create a button1 object it will not initialize it. Due to this it will be swapped away from the memory. This is called Object Life Cycle. That is after a object initialization it does the work given to it and when it finished it just die. 

So experiment with the controls and drag and drop as much as you can into the form. At each time you will create an object and at debugging you will initialize it by the InitializeComponent(); method.

NOTE: We use (.) dot after an object to interact with their fields and methods.
Field and Variable are not same. Fields are declared at the top of the Class and if a field is inside of a Method we call it Variable.

Object Oriented Programming (OOP)


Hello friends, Today I'm gonna discuss some basic concepts about the object oriented programming. So first of all we should know about the term "object" in object oriented programming (OOP). What is an object? You don't have to go to the moon to find an object! Turn around and see everything around you is an object. Why? Cause they have some related attributes and some related activities. For example to see how a computer can be an object you should think about two things

1.What it has & (attributes)

2.What it does (activities)


So as we know a computer has a Processor, Motherboard, Hard Drive, Mouse ,Keyboard etc and it displays information, accepts requests and executes these properly, runs antivirus and game programs etc. So computer is an object.


For More About Object Oriented Programming.

Download this doc file

The document describes all basic concept about the object oriented programming. So read it if you want to build a good concept on OOP.

Thursday, September 20, 2012

Windows Form Controls (Finished)

Take a look at the attached code. Here I demonstrate a example of the dateTimePicker, radioButton and richTextBox Control.
Download Here

1. Open the IDE.
2. Add three labels and change the Text Property to Name, Date of Birth and Sex.
3. Add a textBox, a dateTimePicker and two radioButton control horizontally parallel to the labels.
4. Add a button and set Text propery to Submit.
5. Last of all add a richTextBox control at the bottom of the Form.
6. Double click the submit button and add the following codes.

            string gender;
            if(radioButton1.Checked)
            {
                gender = radioButton1.Text;
            }
            else
            {
                gender = radioButton2.Text;
            }
            richTextBox1.Text = "My Name is " + textBox1.Text + "\nMy Date of Birth is " +
                                dateTimePicker1.Value.ToLongDateString() +
                                "\nMy gender is " + gender;

7. The if else statement checks the states of the radioButton. Then it decide wheather you are a male or female.
8. Then its sets the richTextBox Text property to a string which is a concatenation of the textBox, dateTimePicker control's and gender variable value.

Windows Form Controls (Part 3)

Take a look at the code I provided.
Its an example of CheckBox & Listview.
Download Here
Don't get upset if you don't understand the code. Just see it. I'll describe it tomorrow. 

Windows Form Controls (Part 2)

Lets do something more with the previous tutorial. Open up the previous WindowsControlsTutorials solution.
  1. Add a comboBox from the toolbox to the Form.
  2. Change the Text Property of the button from Show to Add.
  3. Double click on the button and write this
  4. comboBox1.Items.Add(textBox1.Text + " " + textBox2.Text + " " + textBox3.Text); MessageBox.Show("Name Added");
  5. The first line will add a item in the comboBox1 with the given values in the textBox's. The second line will show a notification through a messageBox that a name has been added successfully in the comboBox.
  6. Go back to Form1.cs[Design] tab and double click on the comboBox.
  7. this will generate the event
  8. private void comboBox1_SelectedIndexChanged(object sender, EventArgs e) {}
  9. Write down MessageBox.Show(comboBox1.Text); in the curly braces.
  10. Start Debugging.
  11. Give values and press Add.
  12. This will enter a item in the comboBox with the given text in the textBox's.
  13. Add as many names as you like.
  14. Now select a item from the comboBox.
  15. A messageBox will popup and show the Text of the comboBox selected index. 
  16. In this tutorial when you cahnge the comboBox selected index the comboBox1_SelectedIndexChanged event fires up and show the index item Text in the messageBox.


Windows Form Controls (Part 1)

Since you work on the windows form application, you may have noticed that when an empty form opens up there pops up a tab named toolbox on the left side of the IDE. In this toolbox you can find different types of windows controls to work with in your application. So why don't we discover some of this controls and their properties, attributes and methods.

So here we go....
  1. Start the IDE.
  2. Create a New Project. Name it WindowsControlsTutorials.
  3. Right Click on the Form and choose Properties. On the Right Side of the IDE a window will popup showing different properties of the Form. This properties can be changed at any time manually or through the code.
  4. Try to goofing around with the properties by changing. You will see the changes on the Form.
  5. So let me change the Text of the Form1. Scroll to the text region and set the Text to Windows Controls instead of Form1.
  6. You will see the Header Text Changed to Windows Controls from Form1.
  7. Now drag some controls on the Form.
  8. Drag three labels and release them on the Form. Change the Text property of them to First Name, Middle Name, Last Name.
  9. Drag three textBox from the toolbox and arrange them with the labels. And add a button at the bottom. Change the Text property to Show.
  10. Now double click the show button. It will generate a click event method. There are lots of events available for a controls. Try experimenting with them. They are arranged under the thunderbolt icon of the Properties window.
  11. In the method type
  12. MessageBox.Show(textBox1.Text+" "+textBox2.Text+" "+textBox3.Text);
  13. Click on debug button and give First, Middle and Last name on the textBox and press Show. 
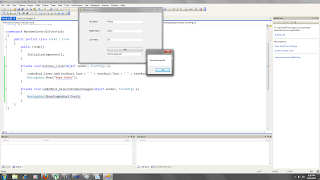
  14. A messageBox will popup and will show your full name.Like this.

Windows Form Application Version of The Hello World Console Application


1. Create a new project of type Windows Forms Application in the same location as
before with the name HelloWorldWindowsApplcation. 

2. Click OK to create the project. You should see an empty Windows form. Move the mouse pointer
to the Toolbox bar on the left of the screen, then to the Button entry of the All Windows Forms
tab, and double-click the entry to add a button to the main form of the application (Form1).
3. Double-click the button that has been added to the form.
4. The C# code in Form1.cs should now be displayed. Modify it as follows :
private void button1_Click(object sender, EventArgs e)
{
                MessageBox.Show("Hello World");
}
5. Run the application.
6. Click the button presented to open a message dialog box, as shown in Figure


7. Click OK, and then exit the application by clicking the X in
the top-right corner, as per standard Windows applications.

10 Steps For Your First Application

So I assume that you already installed the Microsoft Visual Studio 2010 Express Edition. How about we write our first application. I'll start with a Console Application first later I'll will show the same application in Windows Form Application. So what should be our first Application. As you already guessed...It is the typical "Hello World" application. Application that prints "Hello World!!!" in the Console Window.

  1. First open you Microsoft Visual Studio 2010 Express Edition IDE
  2. If it is opened for the first time it will ask you about the working environment settings. Simply Click Visual C# Development Settings. It will take some time. So be patient..:)
  3. Next you will have a start page from where you can create a new project or open a existing project. To create a new project click on New Project or you can also create a new project from the          ->File ->New ->Project
  4. You will get a window asking what type of project you want to create. From the Installed Templates section click on Visual C# node, expand it and select Windows. Then select  Console Application. Give it a proper name (HelloWorld). Choose a saving location if you want and press the OK button.
  5. It will create a Solution with a single project named HelloWorld. In the Program.cs class there is a main method from where a program start executing. It is the static void Main(string[] args) method.
  6. In the method simply type 
  7.           Console.WriteLine("Hello World");
              Console.ReadKey(); 
  8. Then press the play button on the toolbar which is actually called the start debugging button.
  9. Tada!!!!!!!!! A console window will popup and the "Hello World" message will be shown.
  10. Press any key on the keyboard to exit the window.

A step into Visual C#

Microsoft Visual C# is Microsoft's implementation of the C# specification, included in the Microsoft Visual Studio suite of products. It is based on the ECMA/ISO specification of the C# language, which Microsoft also created. While multiple implementations of the specification exist, Visual C# is by far the one most commonly used.[citation needed] In most contexts, an unqualified reference to "C#" is taken to mean "Visual C#."[citation needed]
The term Visual denotes a brand-name relationship with other Microsoft programming languages such as Visual Basic, Visual FoxPro, Visual J# and Visual C++. All of these products are packaged with a graphical IDE and support rapid application development of Windows-based applications.
Visual C# is currently used in development of Windows and Xbox Live games via Microsoft XNA, which allows game developers to create and share their games with other gamers. Visual C# is also heavily used by ASP.NET web sites and standalone applications based on the .NET Framework.

So if you want to learn Visual C#, you definitely need the Microsoft Visual Studio installed. I recommend you to install Microsoft Visual Studio 2010 Express Edition. Try to install the all in one .ISO package which includes the Visual Web Developer 2010. If you face difficulty in installation process, please search the internet. There are thousands of articles and videos on "How to install Visual Studio 2010 Express Edition".